We use cookies to make your experience better. To comply with the new e-Privacy directive, we need to ask for your consent to set the cookies. Learn more.
A Guide to Official Cricket Pitch Dimensions & Markings
- Admin
- Blog Posts
- 25 Feb 2025
-
713views
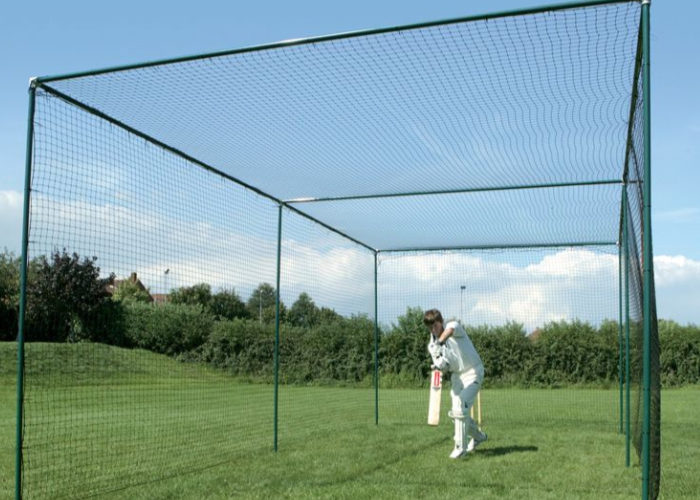
Our guide to cricket pitch dimensions includes all the key specifications according to the MCC, including sizes and different cricket pitch markings.
Here's what we'll be covering:
- Standard Cricket Pitch Measurements
- Cricket Pitch Crease Specs
- Why Accuracy Matters
- What is Needed for Marking a Cricket Pitch
- Step-by-Step Guide to Marking a Cricket Pitch
- Step 1) Locate & Mark the Centre of the Pitch
- Step 2) Mark the Creases
- Step 3) Define the Protected Area
- Step 4) Finalise the Markings
- Cricket Pitch Maintenance & Remarking Tips
- Other Official Cricket Pitch Specifications
- Summary
- FAQs
As a groundskeeper or the manager of a cricket field, one of the most important responsibilities is to ensure the pitch is marked accurately. If the pitch is marked incorrectly, it won’t pass for play or have a knock-on effect on the game.
Not only do these markings need to be correct, but also well-maintained throughout the season to ensure fair play and optimal performance. That includes re-painting them regularly, inspecting the boundary ropes, and keeping the pitch clear of any debris or obstacles.
Read on to discover more about the essential cricket ground specifications…
| Cricket Pitch Feature | Dimensions |
|---|---|
| Pitch Length | 22 yards (20.12 metres) long |
| Pitch Width | 10 feet (3.05 metres) |
| Bowling Crease | 8 feet 8 inches (2.64 metres) wide |
| Popping Crease | 4 feet (1.22 metres) |
| Return Crease | 4 feet (1.22 metres) behind the bowling crease |
| Protected Area | 2 feet (0.6 metres) |
Are you a club, school, or sports facility looking to upgrade your cricket pitch equipment? Edwards Sports can provide you with high-quality cricket pitch gear for professional training and matches.
Shop our range below today. We offer UK-wide delivery, and all of our products are backed by 140 years of industry experience.
Shop Professional Cricket Pitch Essentials
Standard Cricket Pitch Measurements
All pitch dimensions in this guide are according to the Marleybone Cricket Club (MCC) laws, which are regarded as the standard for cricket pitches worldwide.
A standard cricket pitch is 22 yards (20.12 metres) long, measured from stump to stump. This has been the standard since cricket's early days and is a fundamental part of the game. The cricket boundary is beyond this area.
The pitch's width is 10 feet (3.05 metres). This measurement includes the protected area, the central strip, where bowlers must avoid stepping to prevent damage to the surface.
Cricket Pitch Crease Specs
There are also areas called cricket 'creases' that have their own measurements, which you should take heed of:
• The bowling cricket crease is 8 feet 8 inches (2.64 metres) wide and located at both ends of the pitch. The stumps are placed along this line.
• The popping crease is positioned 4 feet (1.22 metres) in front of each bowling crease. It marks the line a batter must reach to avoid being run out or stumped.
• The return crease consists of two vertical lines perpendicular to the bowling creases, placed 1 foot (30.5 cm) on either side of the stumps, and extending at least 4 feet (1.22 metres) behind the bowling crease. Bowlers must stay within these lines during their delivery stride.
Read Our Guide to Cricket Stumps
Why Accuracy Matters
Accurate cricket pitch dimensions are vital to a safe, fair, and consistent match. If the measurements are slightly thrown off, it really can make a big difference…
- Fairness and standardisation across all levels — A pitch with off-measurements could give one team an unfair advantage or disadvantage. Cricket is a worldwide sport, so it's important to keep these dimensions the same to ensure everyone is playing the same way.
- Impact on players' performance — Bowlers, especially fast bowlers, rely heavily on the 22-yard length to perfect their deliveries. Even slight mismeasurements can disrupt a bowler’s rhythm, affecting line, length, and effectiveness. Muscle memory is very much a factor.
- Rule enforcement — Umpires depend on well-marked pitches to make critical decisions like run-outs, stumpings, and no-balls. Inaccurate markings can lead to incorrect calls, potentially altering the course of the game.
- Player safety — Accurate markings help maintain the pitch's structural integrity by ensuring wear and tear occur in the correct spots, reducing the likelihood of unsafe conditions like uneven surfaces or cracks.
- Influence on strategy — Players and coaches design strategies based on standard pitch dimensions. An incorrectly marked pitch could throw off tactics, affecting the team’s overall performance.
What is Needed for Marking a Cricket Pitch
Now that you understand the importance of accurately measuring the dimensions of a cricket pitch, we'll tell you how to mark it so it meets regulation standards.
So, first things first, here are the tools and equipment you'll need:
- Tape measure (at least 22 yards long)
- Wooden or metal stakes
- A square or set square for precision
- Line marking twine
- White marking paint, chalk, or a marking roller
- A hammer or mallet for securing stakes
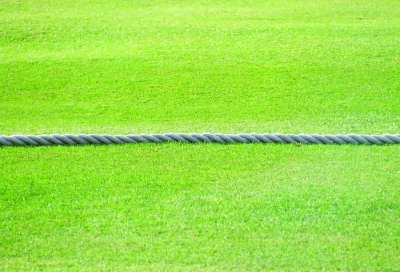
- Boundary rope
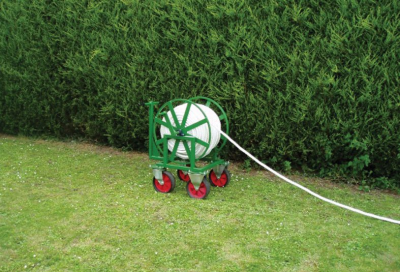
- Boundary rope trolley
Step-by-Step Guide to Marking a Cricket Pitch
After taking note of the MCC dimensions and acquiring all the equipment needed comes the job of marking the pitch. For groundskeepers or those in charge of maintaining a cricket pitch, the following step-by-step guide will help you properly mark the pitch:
Step 1) Locate & Mark the Centre of the Pitch
Choose the area you'd like the pitch to be; remember, it must be flat and level. You should then find the centre point.
To do this, simply measure the width and find the halfway point. From the middle of the pitch, measure 11 yards (10.06 meters) in both directions to mark where the stumps will be placed at each end.
Before you go in with your chalk or paint, our Line Marking Twine will help you draft your lines before officially doing it. This will help with any mistakes you might make.
Now, use your marking string or chalk line between the two stump positions to ensure the pitch is straight. If using string, secure with stakes at each end.
Step 2) Mark the Creases
Now it's time to mark the creases on your pitch, starting with the bowling crease. Remember to use line marking twine before you make any markings with paint or chalk.
The Bowling Crease
At each stump position, mark a line 8 feet 8 inches (2.64 meters) wide, centred on the middle stump.
Mark three spots along this line to position the stumps. The stumps should be spaced so that they cover a total width of 9 inches (22.86 cm). Use your line marking twine to create a solid line along the bowling crease at both ends.
The Popping Crease
Next is the popping crease. For this, you need to measure 4 feet (1.22 meters) from the bowling crease towards the batting end, and this is your popping crease.
The line should extend at least 6 feet (1.83 metres) beyond the return creases on both sides but is often extended across the full width of the pitch. Use your marking twine to draw a clear, solid line.
The Return Crease
Lastly, you need to mark out the return crease by measuring 1 foot (30.5 cm) on either side of the middle stump, perpendicular to the bowling crease. This will be the starting point of the return crease.
Draw two lines perpendicular to the bowling crease, extending at least 4 feet 4 inches (1.32 metres) behind it. Use a square or set square to ensure the return creases are at perfect right angles to the bowling crease.
Step 3) Define the Protected Area
The protected area is a rectangular section in the middle of the pitch, starting 5 feet (1.52 metres) from each popping crease, and is 2 feet (0.6 meters).
Mark the boundaries lightly with dotted lines or a subtle indicator to ensure bowlers avoid stepping into this area during their follow-through.
Step 4) Finalise the Markings
You've marked out all essential areas, so now you just need to double-check your work. Even measurements that are slightly off can affect the game.
You should also ensure all lines are clear and visible, which will make things much easier for the players and the umpire.
Once all markings are complete and dry, remove any stakes and strings used for alignment.
You can now mark the pitch's boundary, which is the perimeter of the playing field. We recommend our heavy-duty Professional Cricket Boundary Rope, which is UV-stabilised and rot-proof for use in all weather.
It also has various diameters to suit your pitch. For any easy set up, no matter how big or small your pitch is, you’d also benefit from our Boundary Rope Trolley, making moving and reeling a breeze.
Cricket Pitch Maintenance & Remarking Tips
Proper maintenance and regular remarking of a cricket pitch are essential for ensuring consistent playing conditions, player safety, and longevity of the pitch surface.
Whether you're preparing a pitch for professional matches, club cricket, or school games, following these maintenance tips will keep your pitch in top condition throughout the season.
• Have a regular remarking schedule and post-match inspections
• Use high-quality marking materials
• Keep the grass trimmed to the MCC’s recommendations (see below)
• Address wear and tear promptly
Other Official Cricket Pitch Specifications
There are some other cricket pitch specifications aside from the dimensions that you should also pay attention to. Here are some you should know about:
• A non-turf cricket pitch should be a minimum of 58ft (17.68m) x 6ft (1.83m).
• Only the umpires can decide the condition of the pitch, determining whether play can continue or not.
• The pitch cannot be changed during a match unless it’s deemed unsafe. Both captains have to agree.
• Grass height should be between 12 and 18mm.
• The governing body for cricket in each county will determine the dimensions for a junior cricket pitch.
• A boundary ensures that no part of any sight screen is within the field of play during any stage of the match, and it must be marked with a white line or object.
Summary
So there you have it, everything you need to know about cricket pitch dimensions and why it's necessary to keep everything accurate for fair gameplay.
It's paramount that groundskeepers and coaches make a valiant effort to follow best practices for professional quality cricket pitch dimensions.
Depending on the league's rules, home teams can be docked points if they produce a pitch of poor standard that's unsuitable for a game. That's definitely something you'll want to avoid.
If your school, cricket club, or sports facility are looking for quality cricket gear, look no further than Edwards Sport.
With more than 140 years in the industry, you can trust our professional equipment.
Shop Our Cricket Equipment Here!
FAQs
What are the Full Dimensions of a Cricket Pitch?
The standard cricket pitch is 22 yards (20.12 metres) long and 10 feet (3.05 metres) wide. This measurement applies to professional, club, and most recreational games.
Are All Cricket Pitches the Same Size?
While the standard measurements remain consistent, there may be slight variations in pitch dimensions depending on factors such as the type of cricket being played and local regulations.
For example, under-11 matches may use a 16-yard pitch, while under-13s might use an 18-yard pitch.
What Tools Do I Need to Mark a Cricket Pitch Accurately?
You’ll need a long tape measure (at least 22 yards), marking string, stakes, a square for accuracy, and white marking paint or chalk. A hammer or mallet may be helpful for securing stakes.
Why is a Cricket Pitch 22 Yards Long?
According to ESPN Cricinfo, the earliest known Law of Cricket, the "Code of 1744", gives the length of a cricket pitch at 22 yards. That has been the rule ever since!


